Well, last weekend didn’t go quite as planned. I had hoped to get over to the Lake District on Sunday for my first hill walk of the year but the weather conspired against me. I didn’t much fancy the advertised 80 mph gusts on the tops, especially when they were going to be covered in cloud anyway! I would have tested my new bag system too, but that will have to wait for another day.
Instead, I ended up going into Durham, so I took my camera with the intention of scouting out shots for my Durham project. As we came out of the Cathedral, I thought of a recent post at Durham Daily Photo and, inspired by this, thought I’d see what I could get in a similar position. It was overcast with some interesting texture to the clouds which I wanted to bring out. Despite not having my tripod with me, I thought I’d try to get an exposure-bracketed set of shots and create an HDR.
The Shot
I took my shot at 24mm (image stabilised), ISO 100, f22 at around 1/15. I dialled in minus 1 exposure compensation to counteract the brightness from the sky and set 2 stops of exposure bracketing. I stayed as still as possible to minimise the work software had to do later to align the three images. I was trying to make sure I didn’t have any people in the shot and the large plinth at the base of the war memorial proved useful for masking visitors on the path to the main door on the right hand side of the shot.
Post processing
I processed the RAW files in Capture One (C1) with no adjustments or sharpening, just output the images to 8 bit TIF files. I normally use C1 for any overall exposure and colour adjustments but because I was planning the HDR there wasn’t any need. For comparison purposes, here’s a simple single exposure simply “tweaked” in C1:
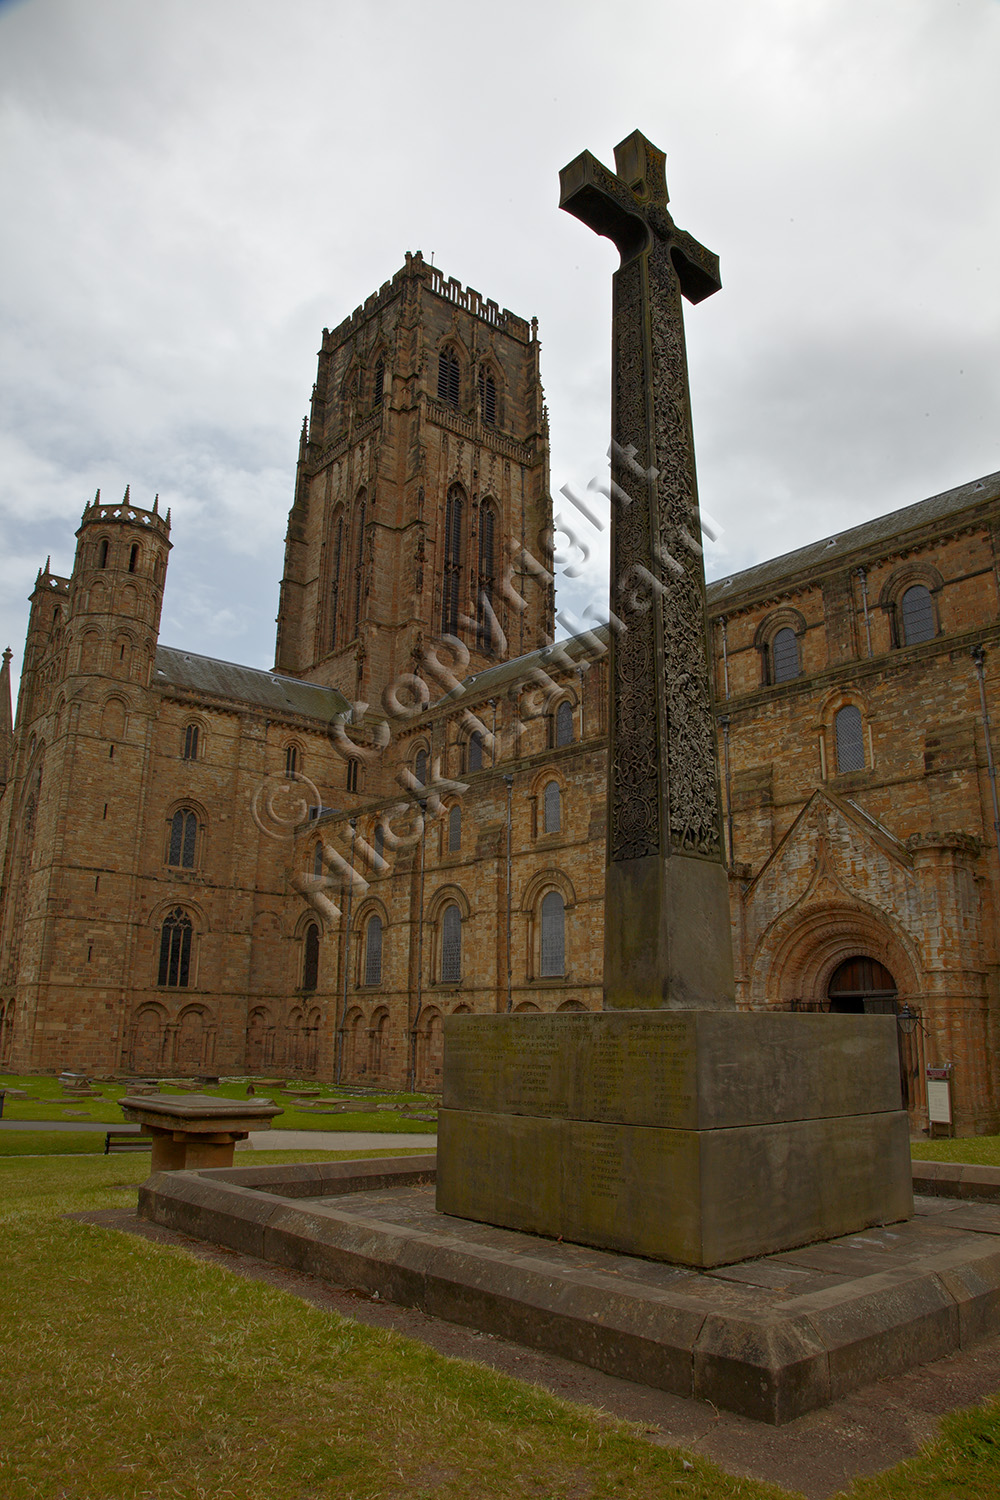
The result is a reasonable record shot but a bit bland, and it isn’t what I’d envisaged when I took the shot, so I pressed on. I combined the three bracketed exposures using Photomatix Pro. To combine the images, I selected the option to match features and also chose to reduce ghosting artefacts for moving objects (high detection), knowing I wouldn’t have been able to keep perfectly still. For the tone mapping, I set high strength, maximum micro-contrast and lowered saturation. This was the result:
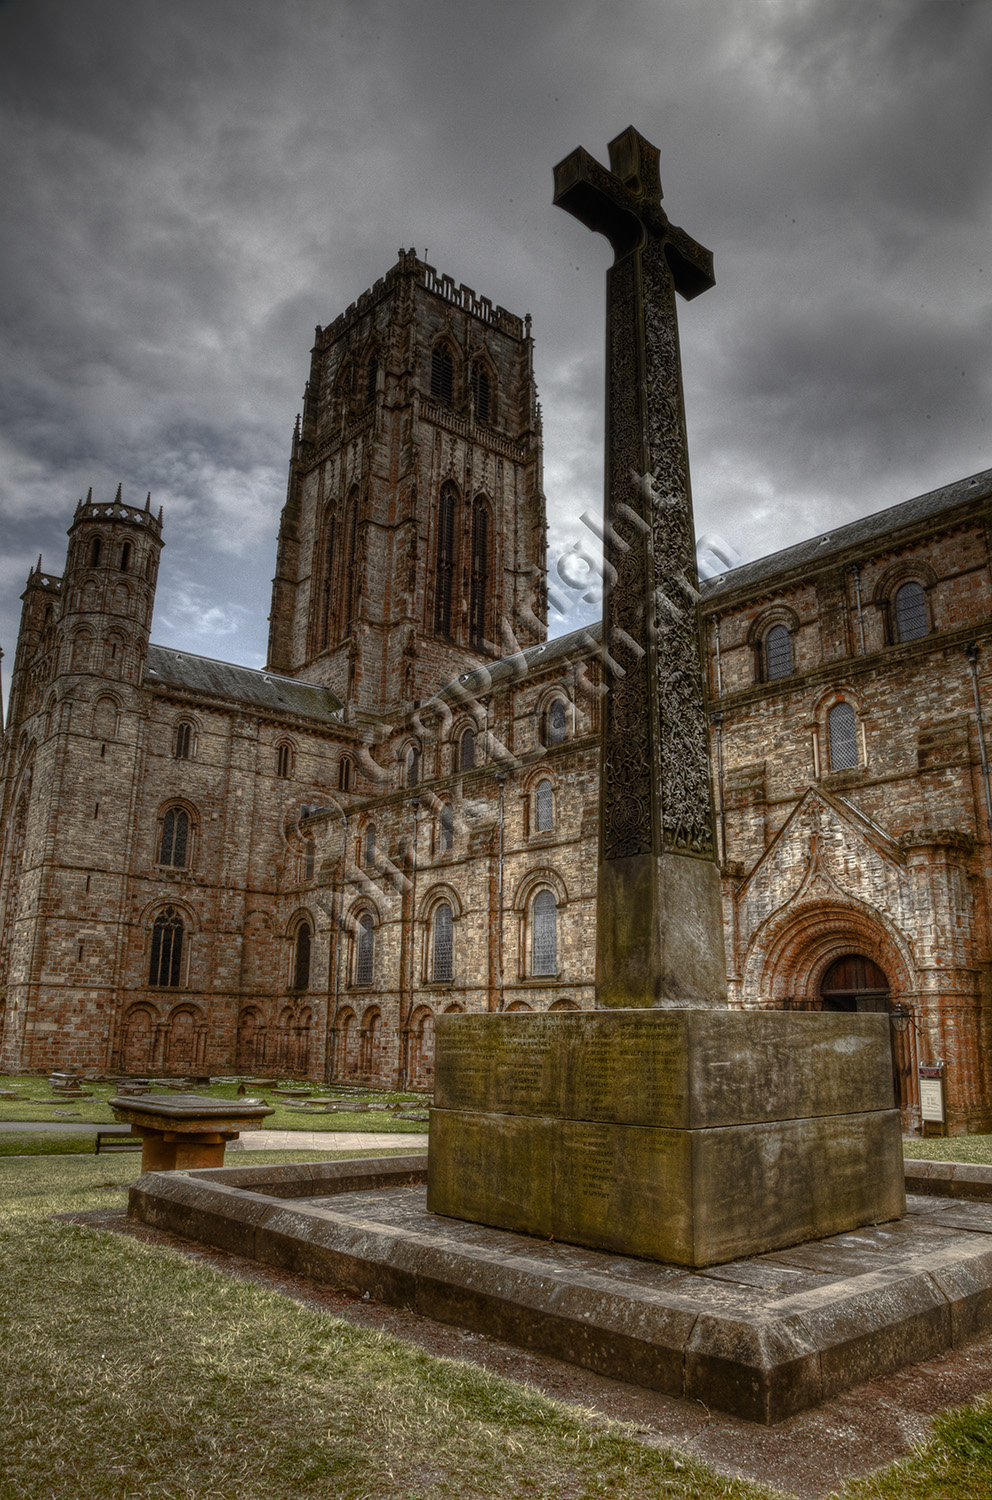
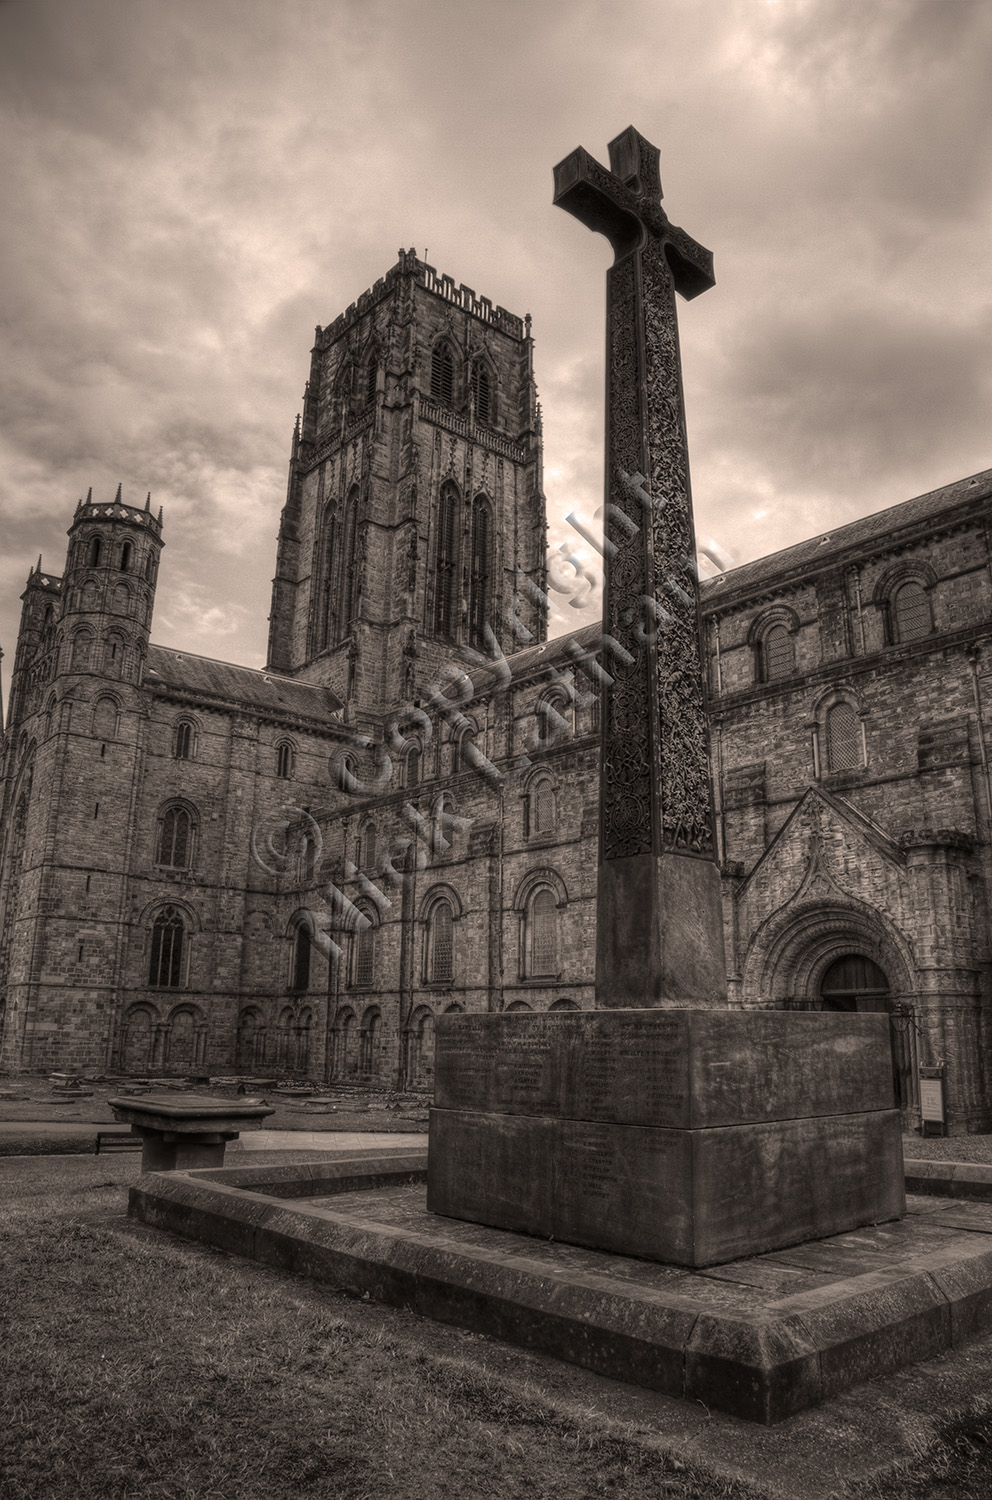
This was heading in the right direction. I needed to clone out some dust spots and also wanted to make a few more tonal adjustments, so I imported the HDR file into Photoshop Elements 8 and added the following adjustments:
- Duplicated the background layer and cloned out dust with the spot healing brush on the copy layer. There are probably other (better) methods for non-destructive cloning but this is a method I’m comfortable with.
- Applied a gradient filter from neutral grey at the bottom to transparent at the top, to balance out the brightness of the foreground against the darker sky and tower.
- Added a brightness / contrast layer to lower brightness and used a mask of black over most of the image, with white painted out over the brighter areas and then tuned to taste using the layer’s opacity setting.
- Added a levels layer to fine tune the overall brightness and contrast.
- Added a Hue/Saturation layer and took saturation to -100.
- Added a photo filter, type sepia, density 60%
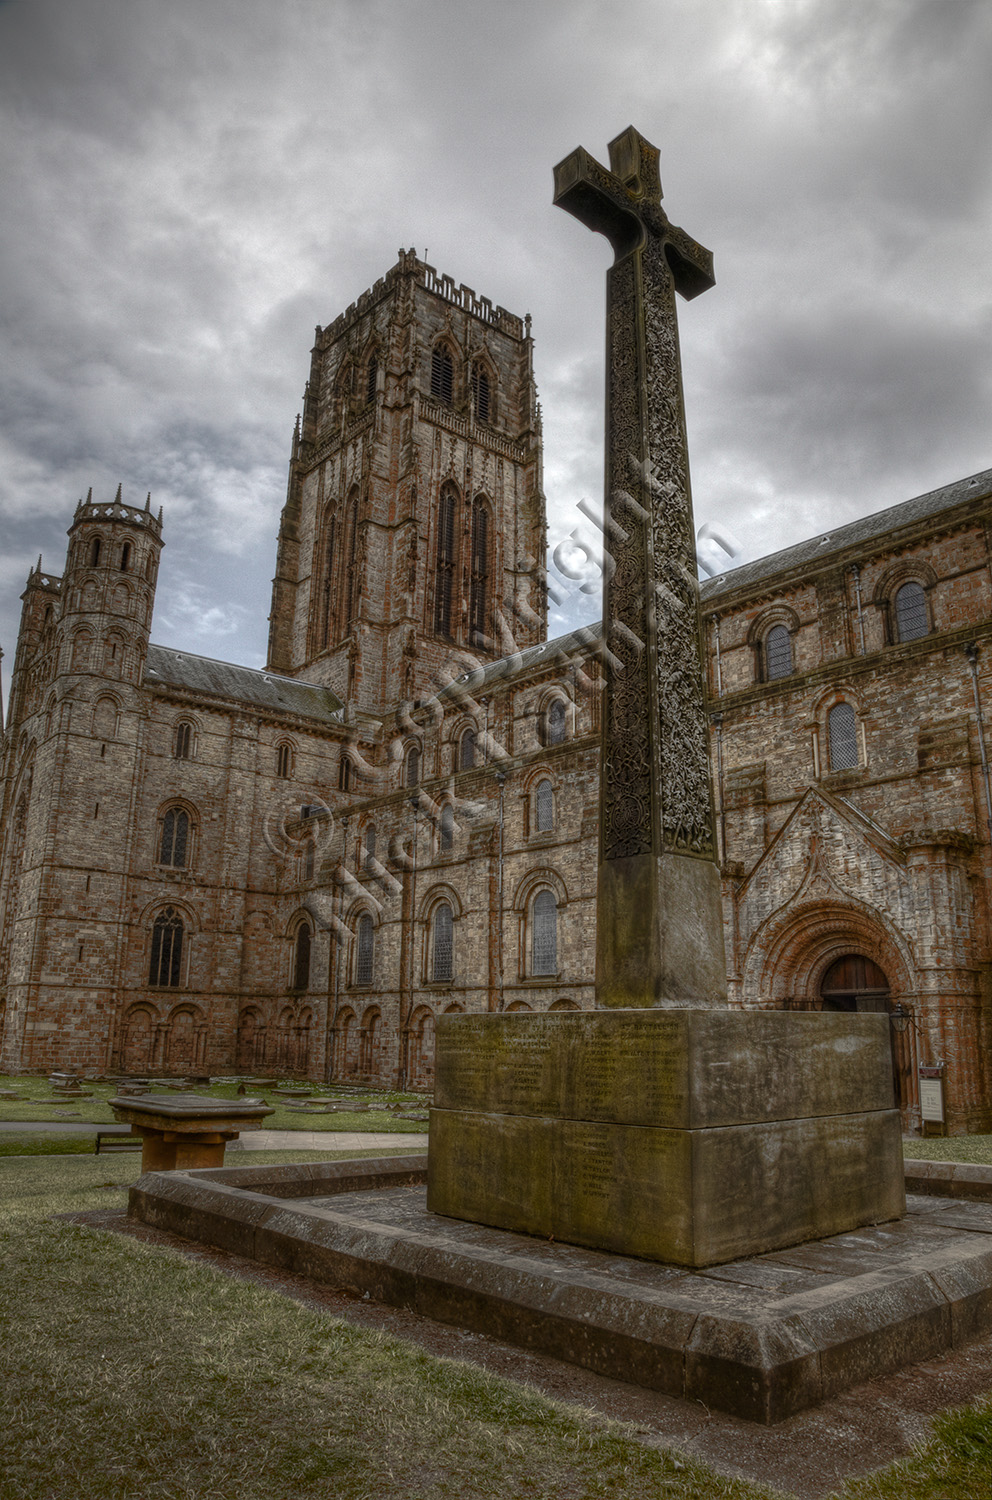
I saved a copy of this (with my usual routine for sharpening and adding the watermark) and also tried a colour version by switching off the desaturation and sepia filters. Comparing back to the original HDR, the adjustments balance out the lower and upper halves of the shot and also tone down the brighter area on the lower half of the cathedral wall.
Which one?
I have my own favourite, but my question to you is which do you prefer? Answers in a comment, please.