In an earlier post, I wrote about a shoot I did in August on Ben A’an in the Trossachs. In this post I’m going to walk through my processing workflow on the Ben Ledi image which I showed you. Details after the jump…
If you recall, I shot with the aim of creating some HDR images. Before I invested a significant amount of time in processing my shots, I tried doing some “quick and dirty” combinations in Photomatix. On the shoot, I captured RAW plus Small Fine JPEG so that I would have a smaller, pre-processed file to have a play around with, and I used these JPEGs straight out of the camera to see which combinations gave me the best starting point. As the files were smaller and I didn’t use all of the file combination processing (noise reduction, reduce chromatic aberrations etc), it meant that I could rattle through several possibilities quite quickly on my aging (and slow, painfully slow) PC in much less time.
Here’s a quick productivity tip – in Photomatix Pro 3.2, you can save your settings for a shot, either as a standalone file or alongside saving the processed image. When I started working on the final shots, I used the .xmp files from my test shots as a starting point. It quickly got me back to where I had left off with the test version.
Capture One – minimal processing
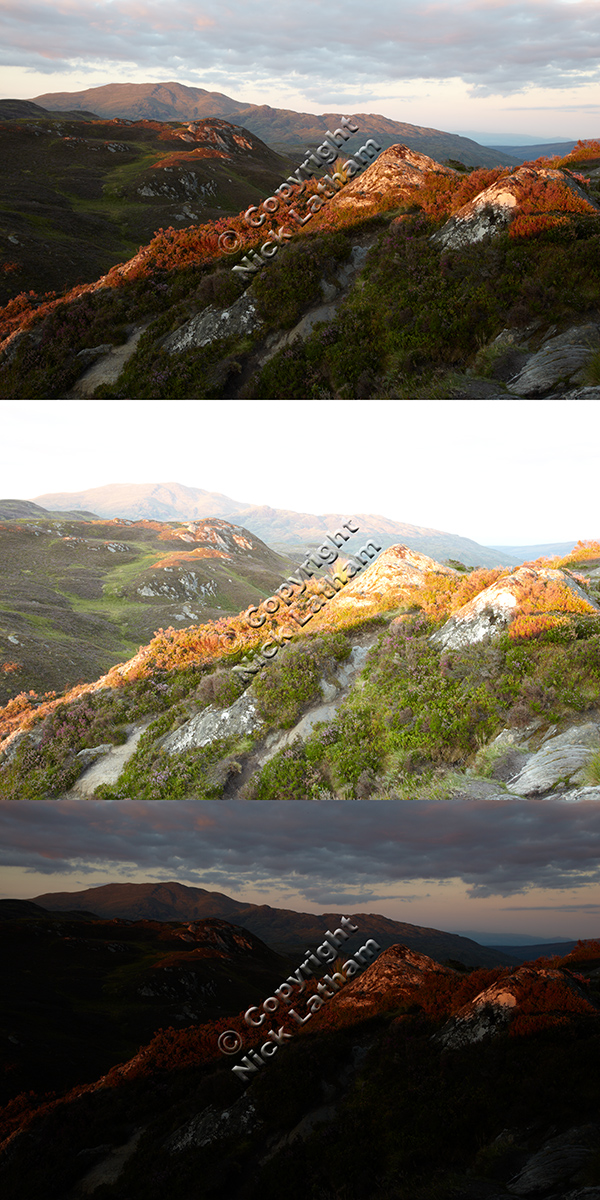
Once I had decided on which sequences to use, I converted the original RAW files into TIFFs using Capture One. I did the minimum of processing in C1, mostly making sure that the three images were consistent with each other in white balance. Here are the converted images for this shot:
Photomatix Pro 3.2
In Photomatix, I selected the three files to generate the HDR and then selected the settings:
- Align source images: not selected as I used a tripod and remote release when taking the source pictures
- Reduce chromatic aberrations: selected – working on the assumption that this would improve the final image quality
- Reduce noise: selected – again, with the aim of improving the final image quality
- Attempt to reduce ghosting artifacts – background movements – normal: selected – there weren’t any major moving objects in the scene, so I was mainly concerned about the clouds
- Take tone curve of colour profile: selected
The output before tone mapping looked like this (click the screenshots to view a larger version):
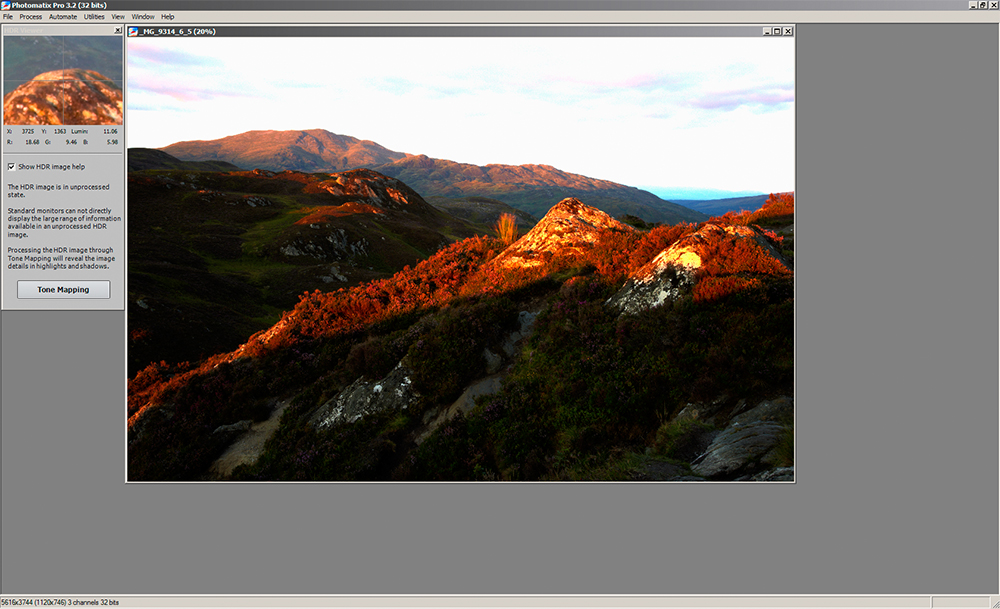
I find it disconcerting to see the image at this stage because it looks so strange, nothing like you think it should, but that’s because the tone mapping hasn’t been applied. After selecting tonemapping, you’re faced with an array of sliders and options. This is both where the magic happens and where you need to be careful. I was aiming for a natural look to my final image, as opposed to the high contrast or “grungy” looking HDRs it’s possible to come up with. For some subjects and some images it works really well, but that wasn’t my goal here.
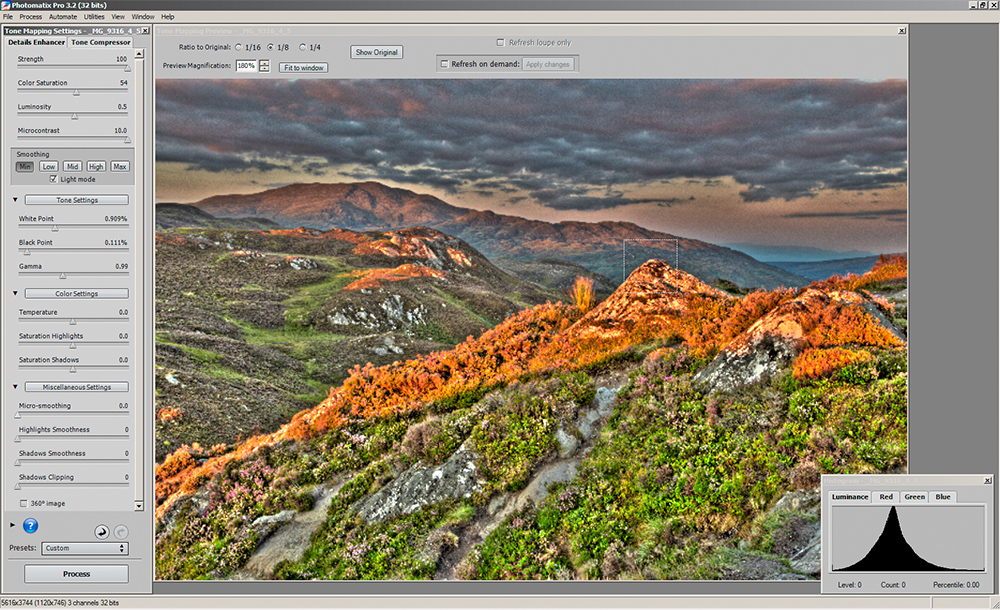
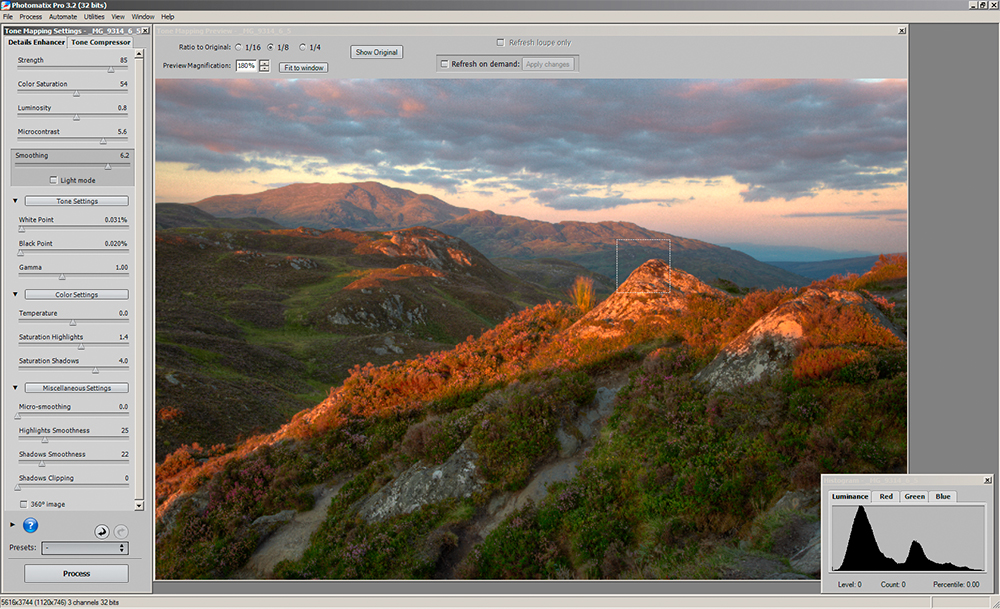
The first version above is deliberately grungy. In the second version you can see the impact of pulling back the strength and microcontrast and increasing the smoothing. If you compare this to the first of the converted RAW images, you’ll see the extra depth and colour that’s been brought out by combining the exposures together, the clouds and sky in particular, but without the artificial look of the first tonemapping exmaple. If you can’t guess, I went with the second version.
Photoshop
Once I had finished tone mapping, I saved the processed shot as a TIFF file and opened this in Photoshop Elements version 8 to do my final adjustments. This screenshot shows the layers I used:
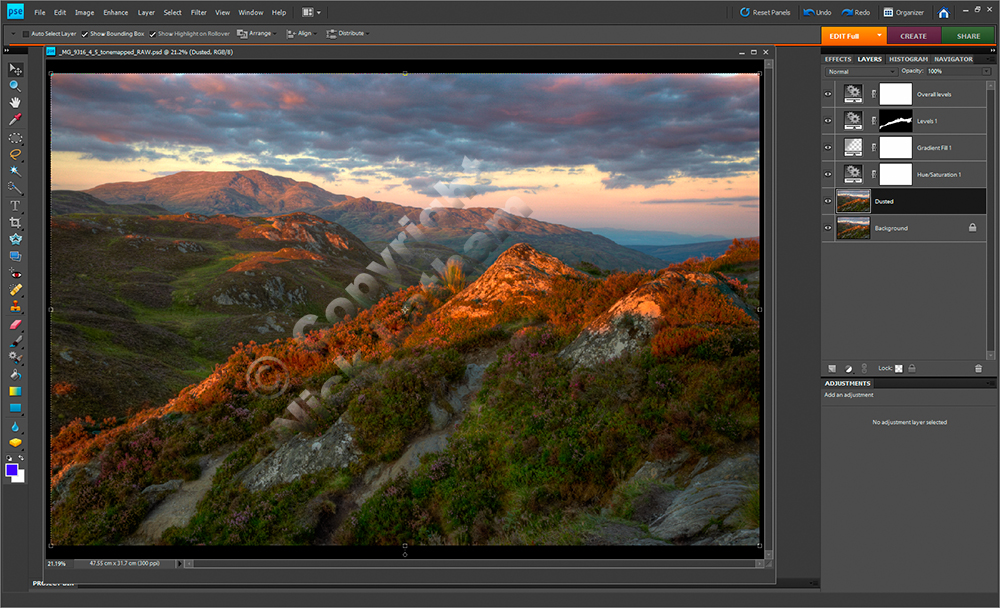 Working up from the bottom of the layer stack (in the right-hand column):
- Dusted – this was a copy of the background layer which I cleaned up for dust spots with cloning / healing brush. Taking a copy of the background means I can quickly get back to the starting image if I make a mistake.
- Saturation +5 (opacity 100%, normal blend) – I could have gone back and reworked the HDR to add a little more saturation but decided just to do it here. This was the PS equivalent of adding a little more seasoning having tasted the sauce.
- Graduated fill layer: I added a graduated fill from mid-grey to transparent, similar to a neutral-density graduate filter, over the sky and aligned to the slope of the land. I changed the blend mode to colour burn and adjusted opacity until it looked good (49%).
- Levels 1 layer was set to darken the mid-tones and then I painted in a layer mask with a soft brush over the strip of sunlight across the foreground to bring it back into balance with the rest of the photo. The blend mode was normal and I tweaked opacity to 70% until I liked the look of it.
- Overall levels layer set the blacks to 10, mids to 1.05 and whites to 250. This added a bit of punch by clipping the highlights and shadows slightly and lightened the mid-tones overall. Opacity was 100% with normal blend mode selected.
After flattening, noise removal and sharpening, this was the final image:

Conclusion
Each image throws up a different challenge. I try to keep to a consistent processing order each time but I let each image dictate the exact processing steps I take. For some pictures, I can do all the processing I need in RAW conversion, others need specific adjustments and adding HDR into the equation increases the possibilities. In the end, I find that the final output is what is important rather than sticking rigidly to a workflow. HDR is a tool which gives you some different processing options and can solve certain problems; I find it a useful tool to have in my bag.
ephotozine has published an article on HDR conversion using Oloneo, an alternative which I’ve never used but might be of interest to you. I’d certainly be interested to hear other readers’ experiences of the impact of adding HDR to their workflow – just submit your comment below.